As you should of seen in my previous DataOn related posts we are setting up a pretty simple single enclosure dual Storage Spaces server test environment. I will be splitting this into a couple of posts, the steps below will take you through how we did the basic Storage Spaces config, the second post will cover the creating of the cluster,your scale out file server and your shares. They are not a complete detailed guides so you will still need to use your common sense.
- Fit the HBA's in each of your host nodes if not already fitted, we are using LSI - SAS 9207-8E 6Gb/s models. You will need to connect one port from each of the controllers in the DataOn 1640 to each of host nodes. Bear in mind for a production deployment you would want to use two HBA's per server to provide resilience to a card failure and multiple (minimum is normally three) DataOn 1640 enclosures so your system can survive the failure of a whole enclosure.
- Our enclosure came populated with disks, if yours didn't now's the time to install them in the caddies and add them to the enclosure.
- Install your OS (Windows Server 2012 R2) on your two hosts nodes, we have named ours labhv01 & labhv02 and join them to your lab environment domain controller, if you do not have have an existing domain controller in your lab you will need to create one.
- Add the necessary roles and features on each of your host nodes. You will need to install the Hyper-V & File Server Roles, along with the Failover Clustering and Multipath I/O Features.
- At this point if you open up File and Storage Services in Server manager and view your physical disks you may see they are showing up twice. This is because we have not yet enabled MPIO support for SAS devices.This can be done by simply opening MPIO properties and ticking the "Add support for SAS devices" box. Be aware this does however require a reboot.


- Once everything has rebooted its time to create your Storage Pools. For this Lab environment we chose to create a "gold" pool with the SSD's and 15k turbo boost drives. We also created a "silver" pool with the remaining 10k drives. Creating the Storage Pools is just a simple matter of right clicking on the Primordial Space in the Storage Pane and selecting new pool, and following the on screen steps.


- You then need to create your virtual disks. To do so, right click the Storage Space you wish to create the Virtual Disk on, in this case our Lab Test Pool Gold and click New Virtual Disk. In the Storage Pool Window make sure the correct pool is selected and click next.
Give the disk a name, we called ours Quorum (this will be explained tomorrow) and as we have the SSD's available we will tick the "Create storage tiers on this virtual disk" then click next. Then set the storage layout, we have opted for a mirror.
We will set the resiliency to Two-way mirror and we will keep to the defaults in the provisioning section.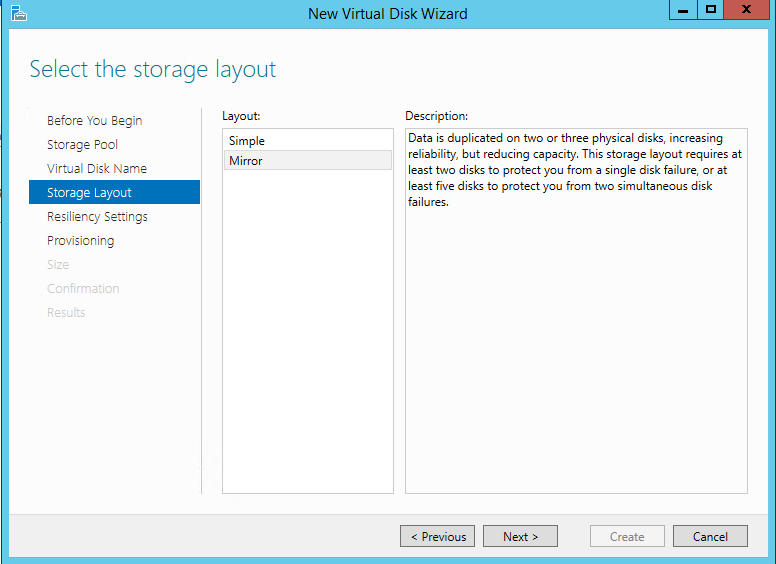
As we chose the tiers option earlier we will have to select how much SSD and how much HDD we wish to allocate, we have opted for 512Mb of each.
Its just then a matter of next and confirm.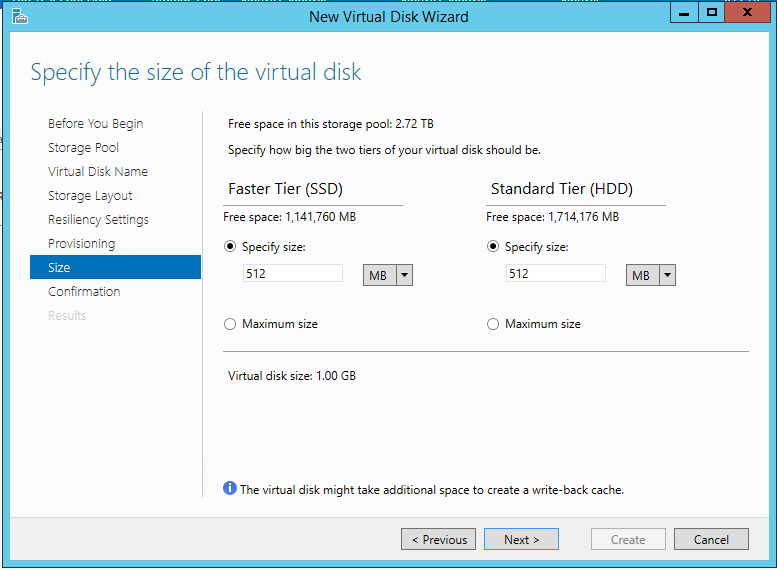
No comments:
Post a Comment